A personalized blend for dryness, itchiness, and gentle follicle support.
Some blends come from longing. This one came from desperation.
After years of coloring and bleaching, my scalp was in crisis—itching constantly, shedding more hair than I could bear, breaking at the slightest touch. Growth had stalled. My curls, newly discovered and still fragile, felt dry and undefined no matter what I tried. I needed something that wouldn’t weigh my hair down but would still offer real support. Not just softness, but healing.
Root Revival was born from that need. It’s a simple blend, but each oil plays a distinct role. If your scalp has specific needs—more moisture, less weight, a different scent—you can adjust the proportions or swap ingredients to suit your skin and hair. Your scalp is as unique as your garden. Trust your senses. Your roots will tell you what they need.
Understanding the Oils
Each oil in this blend was chosen for its relationship with the scalp—some nourish deeply, some soothe irritation, and others help carry nutrients where they’re needed most. Here’s how they work, and how you might adapt them:
Jojoba Oil
Balances, mimics, harmonizes
Technically a wax ester, jojoba closely resembles our skin’s natural sebum. It helps regulate oil production, making it ideal for both dry and oily scalps. Lightweight and fast-absorbing, it creates a gentle base that won’t clog pores.
Adapt if: your scalp is very dry (increase slightly), or very oily (keep as is).
Pumpkin Seed Oil
Strengthens, stimulates, restores
Rich in zinc, vitamin E, and fatty acids, pumpkin seed oil supports follicle health and may help reduce hair shedding. It has a subtle earthy scent and a medium-weight texture that nourishes without heaviness.
Adapt if: you’re focused on growth or thinning areas (increase slightly), or prefer a lighter feel (reduce).
Sweet Almond Oil
Softens, soothes, glides
This gentle oil adds slip and softness, making it ideal for massage. It’s rich in magnesium and helps calm inflammation, especially on itchy or flaky scalps.
Adapt if: your scalp is sensitive or prone to irritation (keep or increase), or if you prefer a more neutral scent (swap for apricot kernel or omit).
Castor Oil
Thickens, anchors, protects
Known for its follicle-stimulating properties, castor oil is deeply moisturizing and slightly sticky. A little goes a long way—it helps anchor the blend and adds weight where needed.
Adapt if: your scalp is dry or you want extra nourishment (increase slightly), or if your hair is fine and easily weighed down (keep minimal).
Fractionated Coconut Oil
Carries, spreads, absorbs
Used sparingly, this always-liquid version of coconut oil helps the blend absorb quickly and spread easily. It’s odorless in some batches but can have a faint scent that not everyone loves.
Adapt if: you want faster absorption (keep) or are sensitive to its smell (omit or replace with a lighter carrier like grapeseed).
This blend is meant for scalp-only use, especially during quiet moments of care. I use it once or twice a week, usually before bed, when the house is still and my hands are free to listen. You’ll find the full recipe card below, ready to adapt.
Optional Additions
If you’d like to add essential oils, choose ones that support your scalp’s needs or simply bring you comfort. Rosemary and tea tree are common choices for itch relief and follicle support, but you can adapt based on scent preference or skin sensitivity. Lavender, peppermint, cedarwood, or clary sage are all gentle options worth exploring.
Start with just a few drops—this blend is meant to nourish, not overwhelm. Trust your nose and your skin.
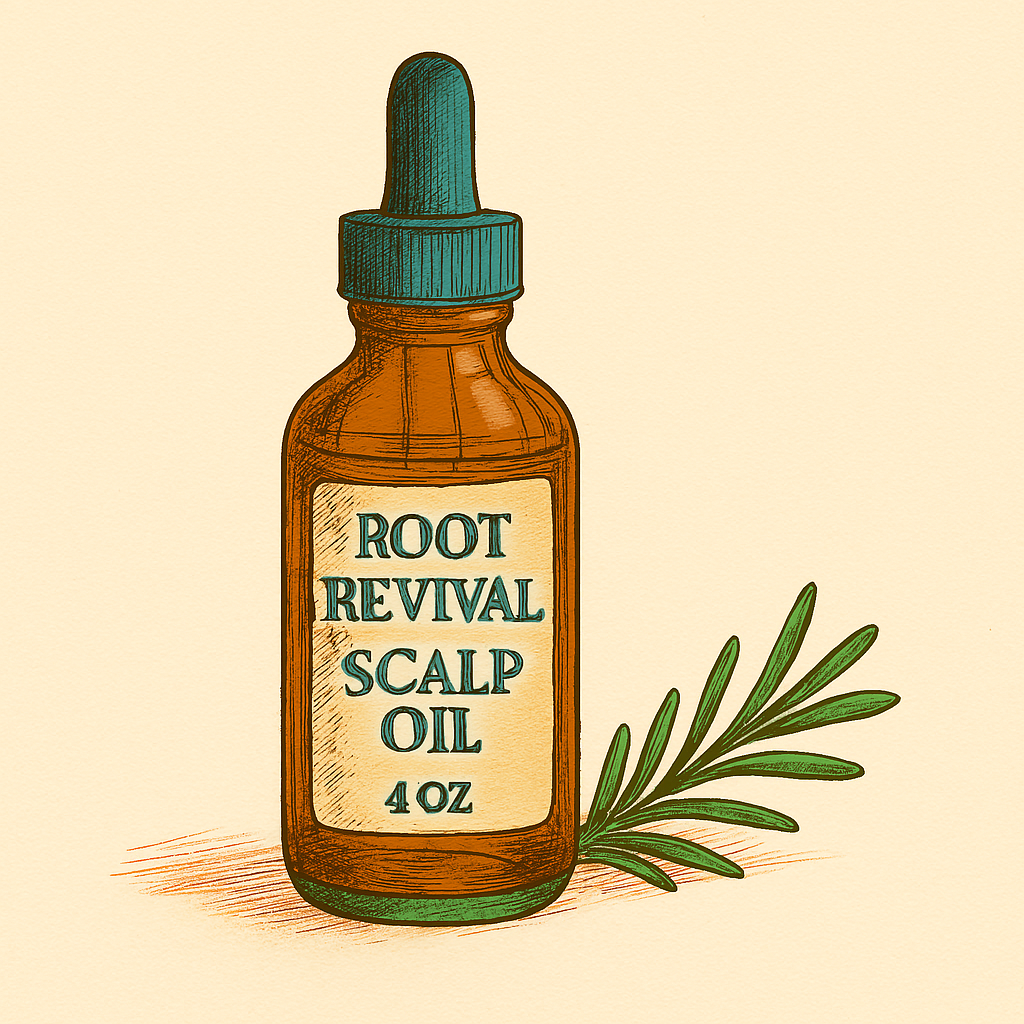
Root Revival Scalp Oil
1
servings30
minutes30
minutesA nourishing blend for dryness, itchiness, and gentle follicle support. Designed for scalp-only use, scaled for a 4oz dropper bottle.
Ingredients
2 Oz 2 Jojoba oil
1 Oz 1 Pumpkin seed oil
2/3 Oz 2/3 Sweet almond oil
1 tsp 1 Castor oil
1/2 tsp 1/2 Fractionated coconut oil
Optional 5-10 drops Optional Essential oils
Directions
- Combine oils in a clean glass vessel.
- Swirl gently to blend.
- Decant into a 4oz dropper bottle.
- Label with date and name.
Notes
- Adaptations
• For winter scalps: increase castor slightly
• For sensitive noses: omit coconut entirely
• For massage: warm bottle briefly in hands before use - Closing Notes
A whisper of fractionated coconut oil is included to support absorption and glide. Though its scent may not harmonize with every head of hair, its presence here is purposeful—offering subtle spreadability and balance. We use just enough to serve the scalp, not the senses.